このエントリは2025/01/09現在の情報に基づいています。将来の機能追加や変更に伴い、記載事項からの乖離が発生する可能性があります。
gRPC Server/ClientをMicronautで作成するにあたっての自分用のメモ。公式ドキュメントは以下。執筆時点のMicronautのバージョンは4.7.3。
Micronaut gRPC
https://micronaut-projects.github.io/micronaut-grpc/snapshot/guide/index.html
目次
gRPC Server
プロジェクト作成
Micronautの場合、gRPC Applicationの作成を明示的に指定するためのcreate-grpc-appというサブコマンドがあるので、それを利用する。
mn create-grpc-app --build=maven --jdk=21 --lang=java --test=junit dev.logicojp.micronaut.grpc.cat.grpc-cat-api
依存関係の追加
gRPC-servicesを追加しておく。執筆時点の最新は1.69.0。
<dependency>
  <groupId>io.grpc</groupId>
  <artifactId>grpc-services</artifactId>
</dependency>
protoファイルを基にしてコードを生成するにあたって、以下のいずれかの構成を追加しておく。
1. com.github.os72:protoc-jar-maven-plugin を使う場合
コード生成のための設定を追加しておく。
<plugin>
  <groupId>com.github.os72</groupId>
  <artifactId>protoc-jar-maven-plugin</artifactId>
  <executions>
      <execution>
          <goals>
          <goal>run</goal>
          </goals>
        <configuration>
          <addProtoSources>all</addProtoSources>
          <includeMavenTypes>direct</includeMavenTypes>
          <inputDirectories>
            <include>src/main/proto</include>
          </inputDirectories>
          <outputTargets>
            <outputTarget>
              <type>java</type>
            </outputTarget>
            <outputTarget>
              <type>grpc-java</type>
              <pluginArtifact>io.grpc:protoc-gen-grpc-java:${grpc.version}</pluginArtifact>
              </outputTarget>
          </outputTargets>
        </configuration>
      </execution>
  </executions>
</plugin>
2. org.xolstice.maven.plugins:protobuf-maven-plugin を使う場合
以下の設定を追加しておく。なお、mnコマンドで生成しているpom.xmlの場合、 com.github.os72:protoc-jar-maven-plugin が追加されていることがあるので、その場合には当該箇所を削除しておく。
<plugin>
  <groupId>org.xolstice.maven.plugins</groupId>
  <artifactId>protobuf-maven-plugin</artifactId>
  <version>${protobuf-plugin.version}</version>
  <configuration>
    <!--suppress UnresolvedMavenProperty -->
    <protocArtifact>com.google.protobuf:protoc:${protobuf.version}:exe:${os.detected.classifier}</protocArtifact>
    <pluginId>grpc-java</pluginId>
    <!--suppress UnresolvedMavenProperty -->
    <pluginArtifact>io.grpc:protoc-gen-grpc-java:${grpc.version}:exe:${os.detected.classifier}</pluginArtifact>
  </configuration>
  <executions>
    <execution>
      <goals>
        <goal>compile</goal>
        <goal>compile-custom</goal>
      </goals>
    </execution>
  </executions>
</plugin>
${os.detected.classifier} を自動取得したいのであれば、以下のextensionを追加しておく。2025/01/09現在の最新バージョンは1.7.1。
<extensions>
    <extension>
        <groupId>kr.motd.maven</groupId>
        <artifactId>os-maven-plugin</artifactId>
        <version>1.7.1</version>
    </extension>
</extensions>
Protoファイル
Protoファイルとして以下を利用する。
syntax = "proto3";
option java_multiple_files = true;
option java_package = "CatAPI";
option java_outer_classname = "GrpcCatApi";
option objc_class_prefix = "GrpcCatApi";
package CatAPI;
service CatService {
  rpc GetCat (CatRequest) returns (Cat) {}
}
message CatRequest {
  string chip_id = 1;
}
message Cat {
  string name = 1;
  int32 age = 2;
}
ここまでできると、protoファイルを基にコードを自動生成できる。
$ mvn generate-codes
自動生成されたCatServiceGrpc.javaで定義されているCatServiceImplBaseという抽象クラスを実装していく(org.xolstice.maven.plugins:protobuf-maven-pluginとcom.github.os72:protoc-jar-maven-pluginでは生成されるディレクトリが異なるが、中身は同じ)。
実装
protoファイルで定義したサービスのCatServiceにて、GetCatというメソッドを定義したので、このメソッドを実装(override)する。動作確認目的なので、NameとAgeを固定値にしている。
@GrpcService
public class CatEndpoint extends CatServiceGrpc.CatServiceImplBase {
    private final Logger log = Logger.getLogger(this.getClass().getName());
    @Override
    public void getCat(CatRequest request,
                       StreamObserver<Cat> responseObserver) {
        String chipId = request.getChipId();
        log.log(java.util.logging.Level.INFO, "Chip ID: " + chipId);
        Cat response = Cat.newBuilder()
                .setName("Tama")
                .setAge(3)
                .build();
        responseObserver.onNext(response);
        responseObserver.onCompleted();
    }
}
あとはビルドすればOK。application.propertiesやapplication.ymlでリスニングポートを指定していない場合、デフォルトではtcp/50051をリスニングポートとして利用する。
gRPC Client
プロジェクト作成
ClientはREST APIとして公開し、裏で先ほど作成したgRPC Serverと対話する構成にする。ただし、ClientからのResponseは、gRPC Serverの応答に加えて、Chip IDを折り返すようにしておく。
mnでプロジェクトを作成する場合、gRPC Serverではないので(create-grpc-appではなく)create-appというサブコマンド(一般的なREST API作成のためのサブコマンド)で作成する。
mn create-app --build=maven --jdk=21 --lang=java --test=junit dev.logicojp.micronaut.grpc.cat.grpc-cat-client
依存関係の追加
gRPC Clientとして動作するため、以下の依存関係を追加しておく必要がある。
<dependency>
  <groupId>io.micronaut.grpc</groupId>
  <artifactId>micronaut-grpc-client-runtime</artifactId>
</dependency>
<dependency>
  <groupId>io.grpc</groupId>
  <artifactId>grpc-services</artifactId>
</dependency>
protoファイルから自動生成するためのしくみはgRPC Serverと同じものを利用する。
Protoファイル
Severと同じprotoファイルを使う(protoファイルでインターフェースを定義しているので当たり前ではある)。
実装
以下のドキュメントに記載の通り、Client beanは自動作成されないので、@Factoryを使って明示的にStubを公開する必要がある。
Micronaut for gRPC does not create client beans automatically for you. Instead, you must expose which client stubs your application needs using a
@Factory.
You can dependency inject aio.grpc.ManagedChannelinto the factory. Each injectedio.grpc.ManagedChannelwill automatically be shutdown when the application shuts down.
https://micronaut-projects.github.io/micronaut-grpc/snapshot/guide/index.html#client
同期型、非同期型いずれのStubも作成できるが、今回は同期型 (Blockingあり) のStubを作る。gRPC Channelは、今回application.propertiesもしくはapplication.ymlに指定したアドレスを使っている。実運用するならEureka ServerやConsulあたりを使うことになるはず。
@Factory
public class CatServiceClientFactory {
    @Singleton
    CatServiceGrpc.CatServiceBlockingStub catServiceStub(
            @GrpcChannel("${grpc.channels.grpc-cat-api.address}")
            ManagedChannel channel ) {
        return CatServiceGrpc.newBlockingStub(channel);
    }
}
gRPC clientの入口は通常のREST APIなので、以下のような感じ。
- Chip IDをQuery Parameterで渡す。
- Chip IDがnullならgRPC Serverへの問い合わせをせずに返す。
@Controller("/api")
public class CatServiceClientController {
    @Inject
    private final CatServiceGrpc.CatServiceBlockingStub catServiceStub;
    private final Logger logger = Logger.getLogger(this.getClass().getName());
    public CatServiceClientController(CatServiceGrpc.CatServiceBlockingStub catServiceStub) {
        this.catServiceStub = catServiceStub;
    }
    @Get("/cat")
    @Produces(MediaType.APPLICATION_JSON)
    public CatResponse send(@Nullable @QueryValue(value = "chip") Optional<String> _chipId) {
        if(_chipId.isEmpty()) {
            logger.warning("No chipId provided");
            return new CatResponse("NO_CHIPID_PROVIDED", 0, "NO NAME");
        }
        String chipId = _chipId.get();
        logger.info("chipId: " + chipId);
        CatRequest request = CatRequest.newBuilder().setChipId(chipId).build();
        logger.info("request: " + request);
        Cat cat = catServiceStub.getCat(request);
        logger.info("response: " + cat);
        return new CatResponse(chipId, cat.getAge(), cat.getName());
    }
}
CatResponseクラスはrecordクラスであり、以下のような定義をしている。
@Serdeable
@Introspected
public record CatResponse(String chipId, int age, String name){}
あとはビルドしておしまい。
動作確認
gRPC Server単体
gRPCのテストクライアントを使って動作確認。Postmanでも何でもよいが、今回はApidogを使っている(実際のところ、chip_idとして文字列を指定していなくても動作するようにしている)。

gRPC Client – gRPC Server
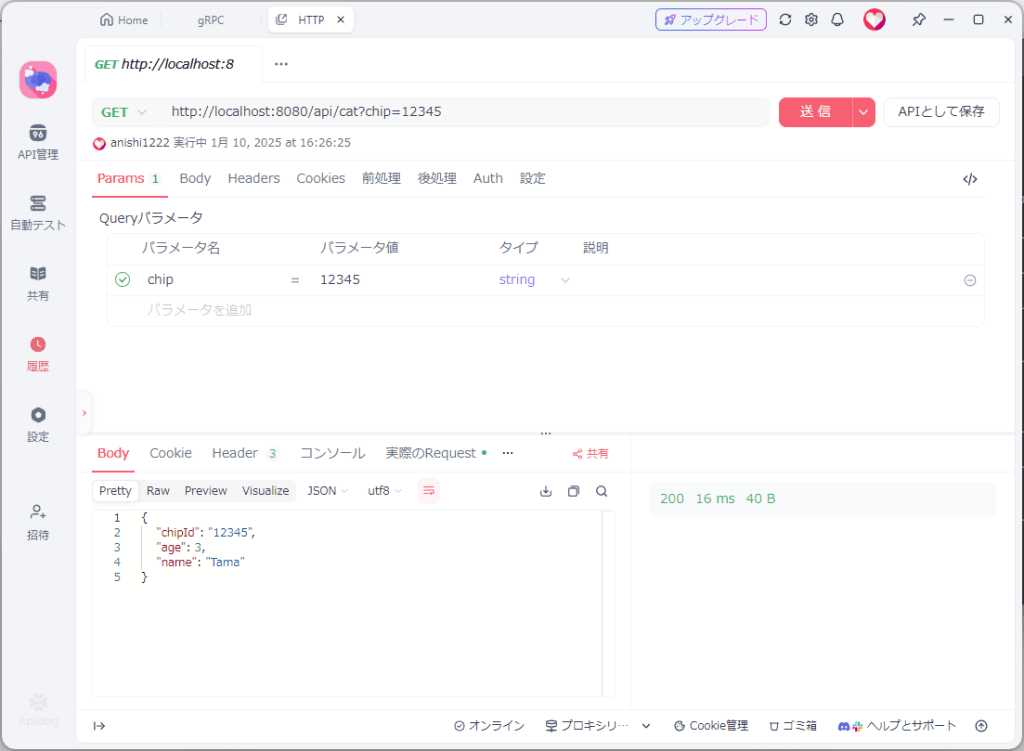
作成したgRPC Clientを実行しておく。REST APIとして作成したので、ポートを明示的に指定していない限り、tcp/8080をリスニングポートとして利用する。こちらもApidogから呼びだしてみると、問題なく動作していることがわかる。
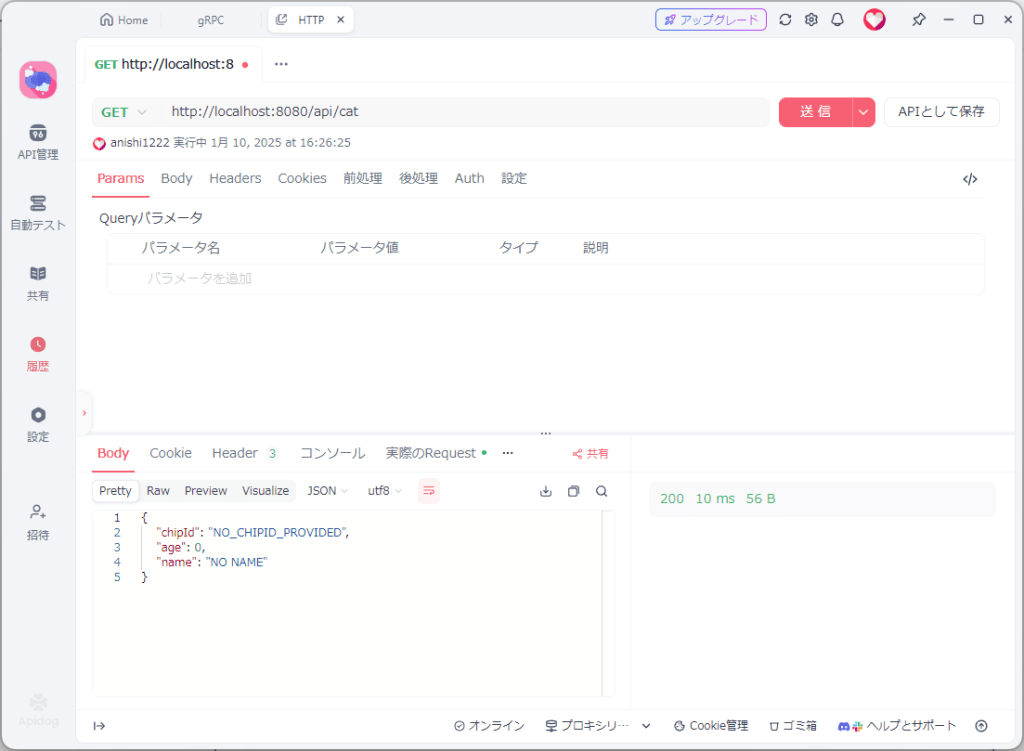
もしchipを指定していなければ以下のようにgRPC Serverまで到達しないで応答していることがわかる。
その他
Health Check
以下の依存関係を追加していればデフォルトで有効化されている。無効化するのであれば、application.propertiesもしくはapplication.ymlでgrpc.server.health.enabledをfalseに指定する。
<dependency>
  <groupId>io.grpc</groupId>
  <artifactId>grpc-services</artifactId>
</dependency>
詳細は以下のドキュメントを参照。
Health Checks
https://micronaut-projects.github.io/micronaut-grpc/snapshot/guide/index.html#_health_checks
Health Checkのprotoファイルは以下のURLにある。
GRPC Health Checking Protocol
https://github.com/grpc/grpc/blob/master/doc/health-checking.md
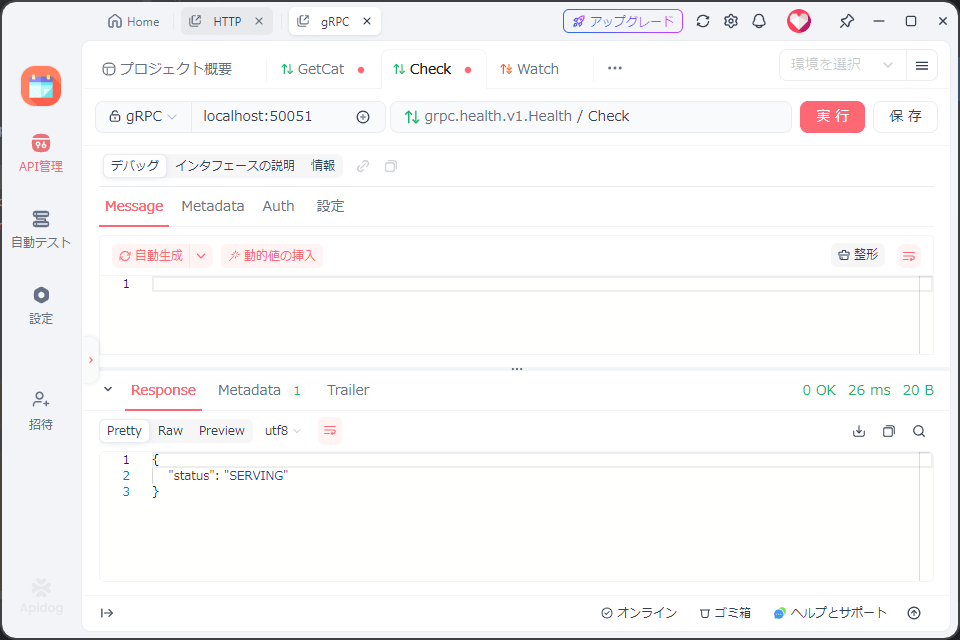
実際にgRPCテストクライアントで実行したら以下のような感じの応答が返る。
Server reflection
Micronautの場合、Server reflectionは2種類の方法がある。
1) 以下のIssueに記載の通りで、@Factoryで登録する方法。
gRPC api discovery by reflection #79
https://github.com/micronaut-projects/micronaut-grpc/issues/79
@Factory
class ReflectionFactory {
      @Singleton
       ProtoReflectionService reflectionService() {
              return ProtoReflectionService.newInstance();
       }
}
2) Micronaut.start() で指定してしまう方法。
public static void main(String[] args) {
    Micronaut.build(args)
            .banner(false)
            .singletons(ProtoReflectionServiceV1.newInstance())
            .start();
}
ポート番号の変更
Micronautの場合、gRPCのデフォルトポートはtcp/50051だが、もちろん変更可能。変更は grpc.server.port で実施する。
# application.propertiesの場合
grpc.server.port=(ポート番号)
# application.ymlの場合
grpc:
  server:
    port: (ポート番号)
# 環境変数での指定
GRPC_SERVER_PORT=(ポート番号)
時として、Micronaut HTTP Server(micronaut-http-server-netty)を依存関係に含めてしまっている場合があるが、Micronaut HTTP Serverの機能を使う必要がない場合、換言するとgRPCをスタンドアロンで使うのであれば、ドキュメントにも記載のある通り、依存関係 micronaut-http-server-netty を外すことが推奨される。
If you wish to use gRPC standalone without the Micronaut HTTP server you should comment out the
micronaut-http-server-nettydependency.
Micronaut gRPC – https://micronaut-projects.github.io/micronaut-grpc/snapshot/guide/index.html#gettingStarted
Micronaut HTTP Serverが含まれている場合、Listeningするポートは、grpc.server.port(デフォルトはtcp/50051)とMicronaut HTTP Serverのポート(micronaut.server.port、デフォルトはtcp/8080)の2個。
GraalVM Native Image
これはいつも通りのPluginを設定してビルドすればOK。
  <profiles>
    <profile>
      <id>native</id>
      <build>
        <plugins>
          <plugin>
            <groupId>org.graalvm.buildtools</groupId>
            <artifactId>native-maven-plugin</artifactId>
            <version>${native.maven.plugin.version}</version>
            <extensions>true</extensions>
            <executions>
              <execution>
                <id>build-native</id>
                <goals>
                  <goal>compile-no-fork</goal>
                </goals>
                <phase>package</phase>
              </execution>
              <execution>
                <id>test-native</id>
                <goals>
                  <goal>test</goal>
                </goals>
                <phase>test</phase>
              </execution>
            </executions>
            <configuration>
              <imageName>${project.artifactId}</imageName>
              <skipNativeTests>true</skipNativeTests>
              <mainClass>${exec.mainClass}</mainClass>
              <buildArgs combine.children="append">
                <buildArg>--no-fallback</buildArg>
                <buildArg>-Ob</buildArg>
              </buildArgs>
            </configuration>
          </plugin>
        </plugins>
      </build>
    </profile>
  </profiles>
